
Social Media
There are many users on social media that have disabilities. Some of these users may even be using assistive technology. There are a few actions everyone can take to make their social media accounts more accessible not only for those with disabilities, but for everyone.
General Formatting
- Format content left to right.
- Use punctuation appropriately.
- Don’t use custom fonts. (Some screen readers skip them altogether or have a hard time reading them, and it affects the searchability of your account.)
- Don’t use “Spongebob case”.
Spongebob case became a popular way of using letters and numbers to write a sentence in a “mocking” way associated with a popular Spongebob meme. However, a screen reader will only read the text as letters and numbers instead of words making your content inaccessible.
DonT uSe thAt WeIrd SpoNgEboB MoCkinG MEme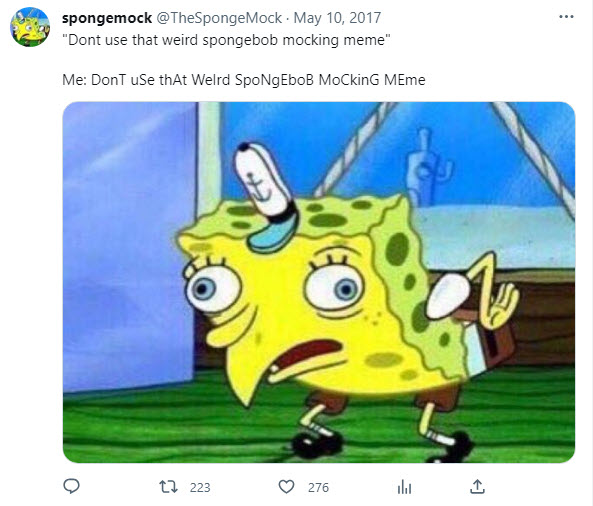
Hashtags
Hashtags should be written in Camel Case: the first letter of each word capitalized. This helps screen readers understand and read the words of the hashtag separately instead of combining it into one word. It also helps everyday users decipher words in your hashtags easier.
- Instead of #idahostatebengals use #IdahoStateBengals
Emojis
While emojis might be a fun way to express emotions or change it up from plain text, overuse of emojis can be a hindrance to social media users that use a screen reader. Keep in mind that a screen reader only reads the description designated for an emoji. Some examples are “grinning face”, “face with tears of joy”, and “smiling face with heart-eyes”. Follow these guidelines to make the most of your emoji use while still keeping your content accessible:
Don’t Use Emojis to Replace Words or Numbers
You never know how these will actually be read by a screen reader or if it will be understood by a user in the way you were meaning.
Don’t Replace Words or Emotions With Emojis
Instead of using an emoji in place of emotions or words, put them at the end of the message or beside the word they are representing. This also helps ensure your emoji is interpreted correctly.
Don’t Repeat or Overuse Emojis
Emojis are fun in moderation, but used in excess can cause screen reader users to get lost in your message. Listening to 10 “kissing face with closed eyes” in a row can be time-consuming for those trying to get to the point of your message.
Put Any Important Information Before Emojis
If there is something important you are trying to communicate to those viewing your social media content, make sure to put it before using any emojis.
Don't Use Emojis as Bullet Points
Using emojis as bullet points is confusing for a screen reader user because the emoji description interrupts the main body of the points. As stated above, put important information in front of emojis.
Use Emojis That Are Well Known
Using popular emojis doesn’t only help those who may have a disability, but it also helps ensure that the meaning of your emoji is understood by individuals from various cultures.
Use Emojis Over Emoticons or ASCII-Art
ASCII-Art and emoticons will be read by symbol, which isn’t helpful for screen reader users. However, if you want to use ASCII art, make sure to add alt text. Here is an example of ASCII-art used on the Accessible Social website from the company Canva on Twitter:
Alt Text for Photos
There are a few things specific to social media that we don't want to use when writing Alt Text including:
- Emojis
- Links
- Hashtags
- Additional symbols
Facebook:
- Begin creating a post.
- Add a photo to the post.
- Select the three horizontal dots in the right-hand corner by the “X”.
- Select edit alt text.
- Add your alt text.
- Post!
Instagram:
- Begin creating your post.
- Add your photo(s).
- Once you are on the page to write a caption, click Advanced Settings.
- Scroll down to Accessibility and select Write Alt Text.
- Add your alt text and select Done.
- Post!
X:
- Begin creating a Tweet.
- Add a photo to your Tweet.
- In your photo, select the button that says +ALT.
- Write your alt text and select Done.
- Tweet!
Resources
- Accessibility Tips for Social Media - Perkins Access
- Accessible Social
- University of Rochester Social Media Accessibility Guidelines
- Five Easy Ways to Make Your Social Media More Inclusive
- Accessibility Tips for Social Media - Perkins Access
- West Virginia University Social Media Accessibility
- American Foundation for the Blind's Social Media Accessibility Guidelines
- Emojis | Readability Guidelines