
Simple Pendulum
Brief Description
This demo is a classic physics demonstration used to illustrate periodic motion, the conservation of energy, and the properties of Simple Harmonic Motion (SHM). It consists of a concentrated mass, or "bob," suspended from a fixed pivot by a lightweight, inextensible string of length L. When displaced from its equilibrium position by a small angle (typically less than 15°), gravity acts as a restoring force that pulls the bob back toward the center, causing it to oscillate. For these small angles, the period of oscillation T is approximately independent of the mass and the amplitude, determined instead by the length of the string and the acceleration due to gravity g according to the formula:
T≈2π√(L/g)
The period of a pendulum, T, is equal to 2π multiplied by the square root of the length of the string, L divided by the acceleration due to gravity, g.
As the bob swings, the system demonstrates a continuous exchange between gravitational potential energy at the highest points of the arc and kinetic energy at the lowest point, making it an ideal model for studying idealized motion in a gravitational field.
Materials Needed
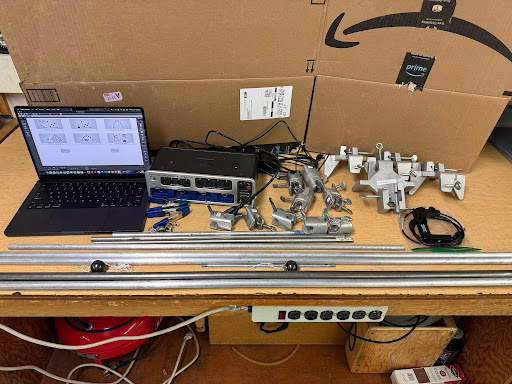
Two 2m rods, two 1m rods, and four rods on the smaller sides (20-60cm), one small threaded rod for Pasco photo gate, four 90° rod clamps, four variable angle rod clamps, four table clamps, two pendulums of different length (0.5m & 2.0m), two clips, two hooks from the Atwood machine box, Pasco photo gate, 850 Pasco interface, and a laptop with capstone app.
Set Up
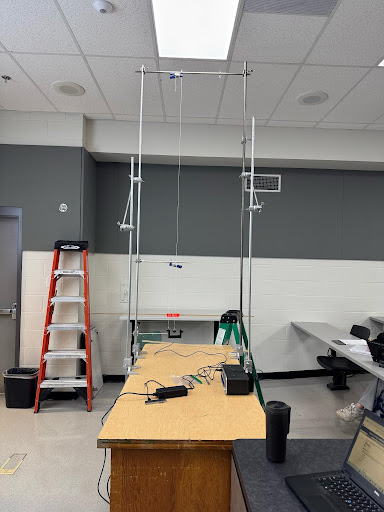
Build the support for the pendulums as shown in the photo. Using table clamps, clamp the two meter and one meter long rods close to each other on the demo table. Then connect the two meter rods together with one of the smaller rods, this rod needs one of the hooks from the Atwood machine attached to it. Using the other two table clamps attach the one meter rods to the demo table so that they are vertical; make sure that they are close to the two meter rods. Using the variable angle clamps attach the one meter rods to the two meter rods (these act as support). Using the third 90° clamp, attach the last rod to one of the two meter rods. This small rod should have a hook attached to it like the horizontal rod at the top of the support. Attach the threaded rod to the photo gate and attach it to the same rod as the previous rod that was attached; make sure that it is close to the table surface. Another note on the photo gate placement, it needs to be place at the bottom of the arch of the pendulum (middle of it arch). Attach the pendulums to the hooks; one at the top of the supports (2.0 above the photo gate) and the hook on the smaller rod ( 0.5m above the photo gate). Connect the photo gate to the Pasco 850 interface, and connect the interface to the laptop. Open the pendulum period capstone file.
Performing the Demo
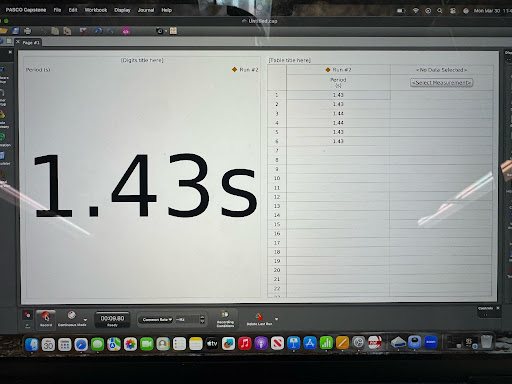
With the timer started in the Pasco file, pull the pendulum bob back at an angle less than 15° with the vertical and release it. The display with show the students that the period for each pendulum.
Safety and Other Notes
A ladder (cat least 6’) is needed for the set up of this demo, as this demo is tall. Use proper ladder safety. There are no other set ups, that I can think of, for this demo.